 Blender Sensor Simulation
 Doing your first sensor simulation in 60 seconds
Step 1: Start blensor
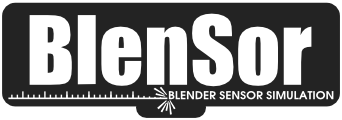
You need to follow the installation instructions to get ready. If you start blensor you will see the following view.
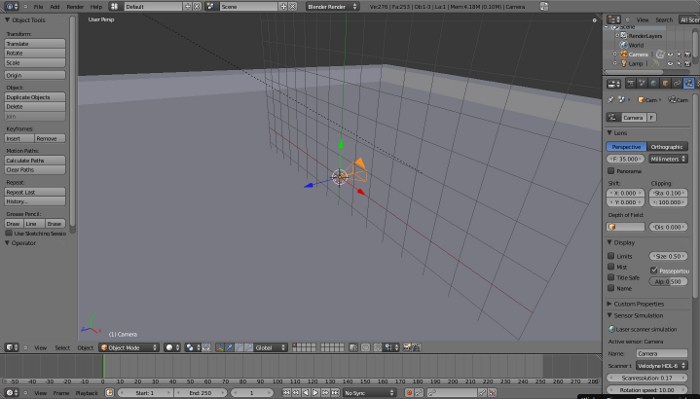
Step 2: Add some objects to your world
You can add primitives by pressing Shift+a and selecting the desired object.
Or you can add objects through the import menu.
Or you can add objects from other .blend files through the Link/Append menu.
Step 3: Configuring the scanner
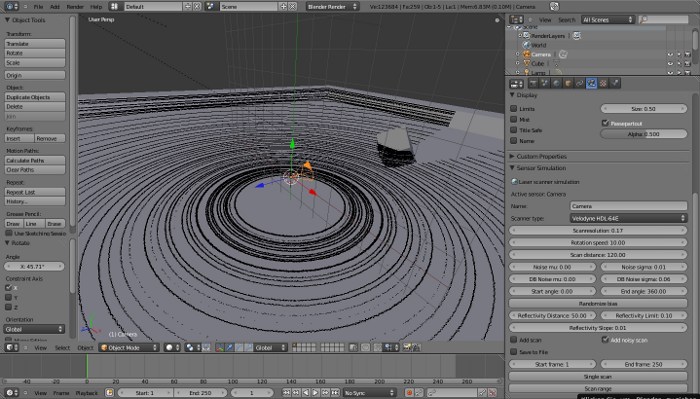
Right-click on the camera object and select the Camera Panel on the right side of the screen.
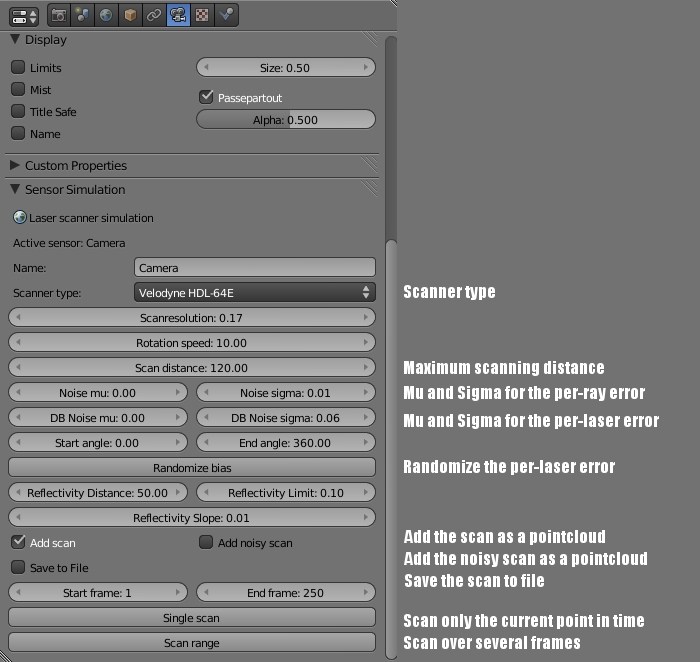
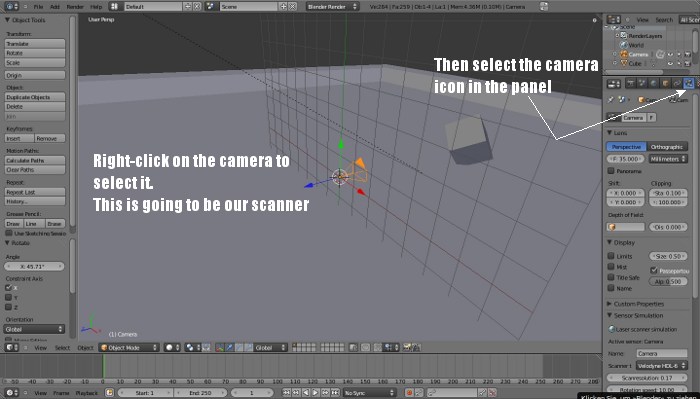 This will show you the scanner configuration.
(NOTE: If you don't see the scanner configuration you need to activate the Sensor Simulation Addon.
File -> User Preferences -> Add-Ons -> System -> Sensor Simulation)
You can select from different scanner types. Every scanner has its own parameters. The most important
parameters are:
- Rotation speed - This controls how fast the scanner rotates. If you are only doing a single scan you should set it to the same value as the Frames per second setting of the renderer. (i.e. to 24)
- Noise mu and Noise sigma - A gaussian noise centered at Noise mu with a standard deviation of Noise sigma is added to every measurement.
- DB noise mu and DB noise sigma - The same as above but a noise that is added to every laser and which stays the same until Randomize bias is pressed.
- Reflectivity distance - All measurements below this distance that hit a material are valid measurements.
- Reflectivity limit - Measurements at the Reflectivity distance need at least a reflectivity of Reflectivity limit
- Reflectivity slope - How much the Reflectivity limit increases per meter
This will show you the scanner configuration.
(NOTE: If you don't see the scanner configuration you need to activate the Sensor Simulation Addon.
File -> User Preferences -> Add-Ons -> System -> Sensor Simulation)
You can select from different scanner types. Every scanner has its own parameters. The most important
parameters are:
- Rotation speed - This controls how fast the scanner rotates. If you are only doing a single scan you should set it to the same value as the Frames per second setting of the renderer. (i.e. to 24)
- Noise mu and Noise sigma - A gaussian noise centered at Noise mu with a standard deviation of Noise sigma is added to every measurement.
- DB noise mu and DB noise sigma - The same as above but a noise that is added to every laser and which stays the same until Randomize bias is pressed.
- Reflectivity distance - All measurements below this distance that hit a material are valid measurements.
- Reflectivity limit - Measurements at the Reflectivity distance need at least a reflectivity of Reflectivity limit
- Reflectivity slope - How much the Reflectivity limit increases per meter
Step 5: View the scan result
If you selected the Add scan or Add noisy scan checkbox in the camera panel the scan result will be added in the current scene. You can then view or edit this scan with the normal Blender tools.